
How to Make a Wooden Coffee Dripper: 9 Essential Steps with Kaila
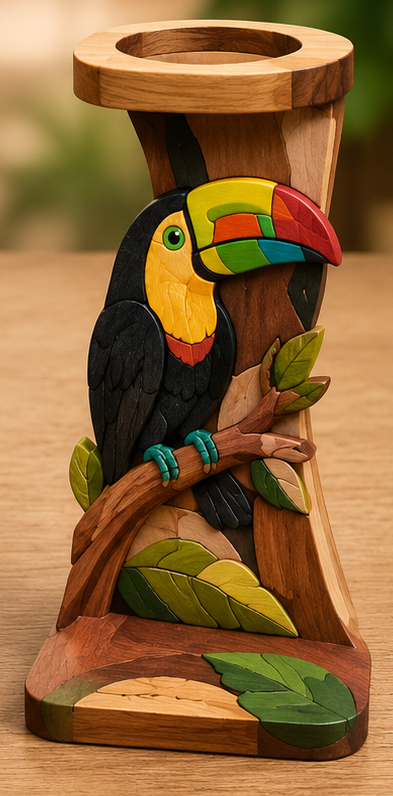
A step-by-step guide to creating a wooden coffee dripper inspired by Kaila, the rainbow-billed toucan from Ticanimals. A warm and practical guide for using wood scraps, shaping with intarsia, and achieving a beautiful, lasting finish.
¿Te gustaria encargar una pieza como esta?
Escribinos por WhatsApp y te respondemos con disponibilidad, tiempo de elaboracion y opciones de entrega.
- Product
- ₡20.000
- Costa Rica shipping
- Shipping to confirm by WhatsApp
- Total
- Total to confirm by WhatsApp
How to make a wooden coffee dripper with Kaila charm
If you have ever wondered how to make a wooden coffee dripper with its own personality, this process can inspire you. At Ticanimals, we worked it around Kaila, our rainbow-billed toucan, to create a handmade piece full of color, patience, and pura vida spirit.
The inspiration: Kaila and the Ticanimals touch
Kaila represents the colors of the forest and the curious energy we want to bring into every piece. That is why this coffee dripper blends usefulness, nature, and a figure connected to Costa Rican identity.

Step 1: transfer the patterns onto the wood
The first step is to transfer the pattern designs onto the wood. One key detail matters here: the thickness should be the same across all pieces so the assembly stays even and the dripper keeps a good shape.
If you have half-inch wood, even better. That size helps the main large pieces fit better and avoids gaps that are too wide or too thin.
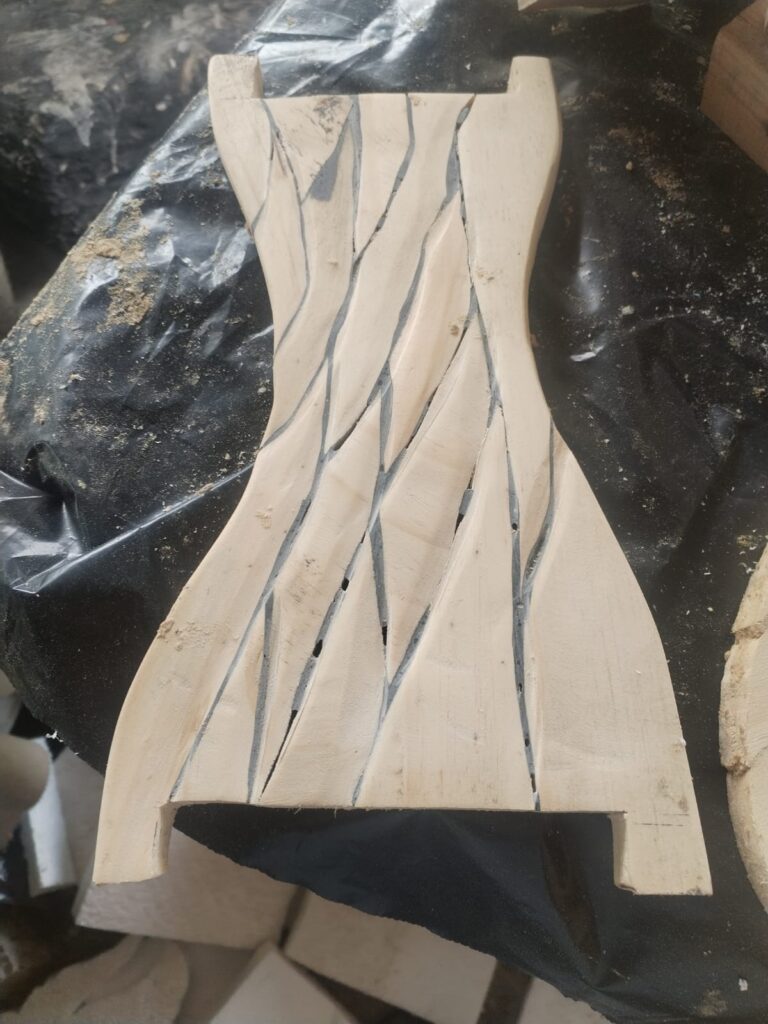
Step 2: divide the design piece by piece
After marking the design, we start dividing it into smaller pieces. This work takes patience because each wood segment becomes part of the feathers, leaves, and structure of the dripper.
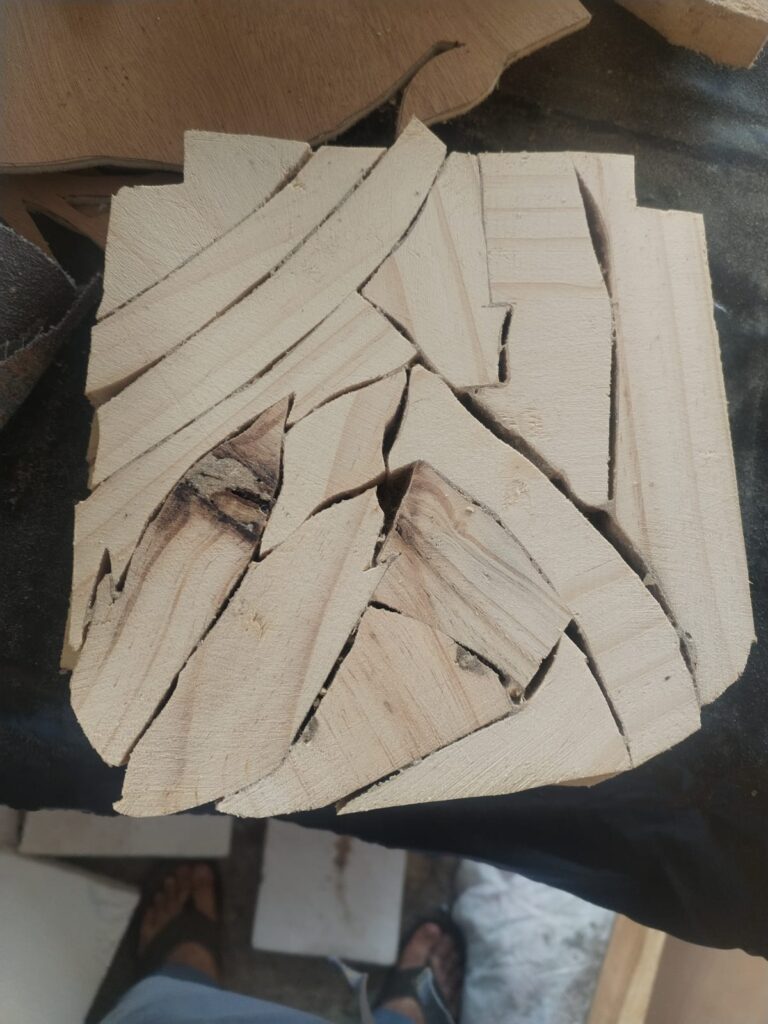
Step 3: cut with a detail tool
The cutting can be done with a table scroll saw or another detail saw for wood, always with care and practice to respect each shape. This is where the design starts coming to life.
Reference tool for detailed wood cuts. This is the referral we use for the table scroll saw.
Step 4: sand edges and prepare the joints
Each small piece is sanded around the edges to round it slightly and give it a better finish. Then the pieces are joined again using a paste made from wood glue and sawdust, a simple but very useful mix for handmade work.
Step 5: join the main parts of the dripper
Once the small parts are ready, it is time to join the larger pieces. We use the same paste and nails that double the wood thickness, so the assembly gains support without losing the overall shape of the dripper.
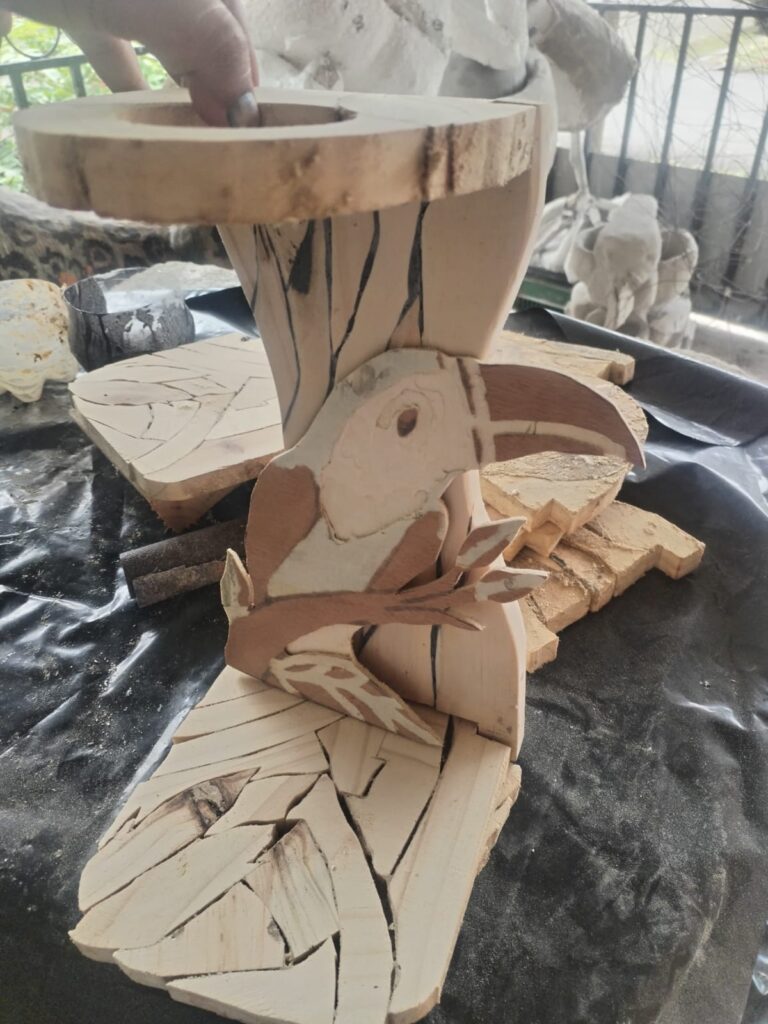
Step 6: sand until the piece transforms
Once everything is joined, sanding comes back, and this is where taking your time really matters. You can start with 100-grit sandpaper, then 180, and finish with 240 or 320 to leave the wood smooth and ready for color.
Step 7: add relief and handmade details
All los bordes deben trabajarse bien para que el chorreador no se vea deformado. Si querés agregar más relieve y detalle, una moto tool, unas gubias o incluso un router de palma pueden ayudarte, aunque este último requiere bastante práctica.
Step 8: apply sealer before color
With the piece assembled and sanded, there is one step you should not skip: applying sealer. This keeps the wood from absorbing too much paint and helps the color look stronger, more even, and closer to what you want.
Step 9: paint, protect, and leave your mark
After that, all that is left is to paint in your own style and enjoy the process. At the end, you can protect the piece with varnish or encapsulate it with resin, depending on your taste or budget, giving each dripper its own story.
We hope this guide encourages you to use those little pieces of wood you may have around and turn them into something beautiful. If you make your own Kaila dripper, tell us how it went.
Recommended materials and tools
¿Te gustaria encargar una pieza como esta?
Escribinos por WhatsApp y te respondemos con disponibilidad, tiempo de elaboracion y opciones de entrega.
- Product
- ₡20.000
- Costa Rica shipping
- Shipping to confirm by WhatsApp
- Total
- Total to confirm by WhatsApp
Comments for subscribers
Subscribe for free to leave questions, ideas, or messages on this post.